How To Take Care of a Fireplace


How often do you take the time to thank your fireplace for all the times it kept you warm during power outages? How about those nights where its flickering flames sparked an evening of romance, or those times when its unmistakable smell brought comfort and calm to your life?
There's a great way to thank your fireplace - take good care of it!
  1. Encourage good draft up your chimney. You can do this by keeping a window open while you burn a fire. The air entering your room will get sucked up the chimney. Opening a window also ensures that your indoor air quality stays good while you burn the fire.
  2. Open glass doors when you use the fireplace. If you have glass fireplace doors, invest in a screen to block the fire instead of using glass. Doing so will also aid in ventilating the fire and encouraging airflow through the flue.
  3. Hire a chimney sweep. The flue inside your chimney suffers a gradual build-up of creosote (hard-layered residue from the wood-smoke), which can catch fire. You have to clean your chimney periodically in order to avoid such a catastrophe. This isn't a do-it-yourself project; you need to hire a professional to clean your chimney. You should have your chimney cleaned once a year if you use it a lot. If you use your fireplace two or three times per week during colder months, have it inspected and cleaned each year. Another handy method is to inspect and clean after every 70 fires. Ask the chimney inspector about the condition of your flue liner and (if you have a masonry chimney) mortar.
  4. How to reduce creosote build-up?
    • Proper wood. Dry hardwood logs are ideal for your fireplace; less moisture means more complete combustion.
    • Ventilation. A smoky fire is the result of wet wood, poor ventilation or both. You can improve ventilation by keeping glass fireplace doors open (replacing them with a mesh screen).
  5. Clean the ash out of the fireplace. Wearing a dust mask, open a window in the room and then open the damper to let the draft suck any airborne ash out of the fireplace. Then, using fire gloves, remove the old coals. You can use the broom and dust pan fireplace tools to carefully and slowly gather the dust that remains along the floor of the fireplace. Remember to wait about three days after the original fire to do any of this; embers stay hot for a surprisingly long time!
  6. Chimney cap. Not only can an uncapped chimney collect gunk and debris, but it can also cause your damper to rust or even invite animals to make it their unlucky home. Proper fireplace maintenance requires that you have a chimney cap on top.
  7. Glass doors and facades. You can purchase glass cleaners, brick cleaners and other appropriate cleaners to maintain the happy appearance of your fireplace. If you have dish soap handy, simply dilute it to make your own glass cleaner.
These simple steps can ensure that your enjoyment of the fireplace is not dampened by lingering doubts about safety. Let your fireplace know that you care; keep it maintained and running smoothly!

0 comments:

How To Tell the Age of Termite Damage


Regular cleaning is a way of taking care of your home. It’s normal to take good care of this because this is where you and your family live. Sometimes, even if you clean this regularly, there are insects and animals, which get into your house and ruin your precious home and the things inside it. Rats, cats and even your pet dogs can be culprits in causing these damages. Aside from these, termites are also common cause of damage inside the house leaving holes in the wall and cracks on woods. If you see any termite damage in your house though you already had your house treated for termites, you may want to check first when the termite damage was made. This may be before the treatment. If that’s case, it means that there’s no need for another termite treatment and you just have to fix the damage. If the damage is just new and was made after the treatment, this means that you need to get termite control again.

Here are the steps on how to tell the age of termite damage.
  • Check for termites around the damaged area. The easiest way to determine if the damage is new or old is to see if there are still termites in the area. If there are still termites in the area, this means that the damage is just new. If there are no termites in the area, it’s probably an old damage that was made by the termites before the treatment. Don’t just look outside the damaged area. Knock on the damaged wood to see if there are termites hiding inside or at the back of the damaged part. If there are termites around, they will surely go out after knocking on the wood. If there are no termites, it’s best to check if there are termite eggs around. These are usually white in color or sometimes clear. If you see any of these, it means that there are still termites around which just recently caused the damage.
  • Check for the wood’s color and smell. See if the color of the damaged wood is gray or has faded. If this is the case, it means that this is an old damage. If the wood’s color is still bright or it still looks new and you smell the scent of wood that has just been cut, it means that the damage is just new. This was caused by termites that are still living inside your house. You can also tell if the damage is new if you see termite wings that have fallen around the area as well as their droppings.
  • Follow the termite tube. Termites build tubes so they can access wooden parts in your house that they take as food. If you see a termite tube, follow the tube and see if there’s paint somewhere that goes over the tube. If there is, this means that the paint was applied after the tube was made. So it means that the damage is old. If not, it means that you need to act immediately and have this treated.

If you already hired a professional for treating your termite problems and you still find new damages which might be caused by termites, it’s best to contact the termite control professional you hired so he can resolve this concern.

0 comments:

How To Treat Unfinished Pine Wood Furniture


Pine is a soft wood that can be crafted in variety of designs. Finding well-crafted but unfinished pine wood furniture is already a bargain. Imagine, with just a few investment and a few effort, you can already turn an unfinished piece of furniture into something elegant and classy. Here’s how to treat unfinished pine wood furniture:
  • Keep the furniture in a safe place. Do this if you won’t start the treatment yet. Store the pine wood furniture away from direct sunlight or heat source because pine wood is vulnerable to shrinking and cracking. Keep the piece away from moisture, too. Extreme and sudden change of temperature will form moisture on the piece.
  • Prepare the unfinished pine wood furniture. Wipe the furniture with clean cotton cloth to remove its dusts and other foreign debris. Do this every day if you will keep the furniture first before treating it. Dirt and dust build-up will be more difficult to remove. Discoloration might happen, too, and give the furniture an ugly appearance. If stubborn dirt build-up is already on the furniture, then use damp and clean cloth to remove the dirt. A bit of wood soap will be useful for removing difficult spots. However, do not use any soap or chemical directly on the pine wood without spot testing. Try it on a hidden part and this way, you’ll see whether the product will give unwanted stain on the wood.
  • Apply protective coating for the wood. Wood oil and similar products that could protect the wood should be used to keep the furniture looking its best. If you can, apply lacquer paint on the wood and then occasionally apply wood oil to the furniture. The protective coating will prevent the wood from drying out. But before applying any protective coating, spot test the product first on a hidden part. Some coatings can cause nasty discoloration that can be hard to remove.
  • Apply furniture wax on the wood. This is another alternative to protect the pine wood from damages like water, moisture, dusts, and dirt. The wood wax will make the furniture shiny, too. The wax manufacturer has instructions on how to use their product. Simply follow the label when using the wax. But then again, spot test the furniture wax first before applying it on the entire piece. Apply it first on a hidden part to see its effect. Leave the wax on for about an hour or two. See if it has any negative effects on the wood. If it has, try to use another brand of furniture wax.
  • Prevent anything from staining the pine wood furniture. Applying protective coating or wax on the pine wood is not enough. The coat will only prevent anything that the owner cannot control anymore. So as much as possible, keep alcohol, coffee, and tea away from the furniture. But if prevention is too late, then at least act as soon as you see stains on the wood. Treat the stains as soon as possible because the longer they stay on, the more difficult they can be removed.

Furniture pieces, even the unfinished ones, are important investments that could outlast your lifetime. They are something that can be passed from generation to generation. So, take good care of it and treat it like a treasure. After all, you are one of its creators because you have treated it so well.

0 comments:

How To Treat Mildew Damage


Mildew can be such a hassle because it is unsafe for a person’s health. It can cause allergies and can affect a person’s total well-being. It’s important to treat mildew problems to ensure the safety and good health of your household. Luckily, it’s easy to determine where mildew grows because it thrives in warm, dark and moist/wet places and comes with a musty smell.
  • Bleach is your best friend. One of the best ways to beat mildew infestation is to use chlorine beach. Before starting, openn all windows or keep the area ventilated in order to avoid inhalation of toxic bleach fumes. For colored or painted areas, a quart of bleach, plus a tablespoon of liquid dishwasing detergent and nine quarts of water will help eliminate that mildewy problem. With a sponge, wipe down the area with mildew until it is removed, but make sure to rinse thoroughly using plain water to completly remove the solution. Then, dry completely.
  • Out of the closet. One of the worst places to find mildew is  in your closet, where it can attach itself to your precious clothes and ruin them. Instead of bleach, vinegar is the treatment to use, especially since it is all natural and better for the state of your clothes and a frequently accessible area as a closet. You’ll need a spray bottle and white distilled vinegar. Pour the vinegar into the spray bottle and apply to your clothes,  bags, accessories, etc. Leave on for several hours so that the vinegar can permeate and loosen the mildew and keep the treated objects in an airy, open place like on a table under the sun. Then, wash your clothes or rinse your accessories in warm water with ample detergent to get rid of the vinegar and the mildew.
  • Saving your wood. To get rid of mildew on wooden objects in the house, first, vacuum as much as you can of the mildew. Use the brush attachment to help loosen the culprit. Mix a gallon of hot water and mild soap, then use a rag to wipe the affected area. Clean the rag often to make sure that you’re not just spreading the mildew. For tough, clingy mildew, take a gallon of hot water and mix with 4 ounces oxygen bleach. Let this mixture sit for about five minutes then dip a clean rag and wipe down the wood. After this is done, clean off the solution with water. Then, dry completely with a dry, clean rag.
  • Precautionary measures. You know the old adage, “Prevention is better than the cure”. Before mildew invades your household, keep it from entering in the first place. A dehumidifier can help limit moisture inside your house, thus keeping mildew away. A good ventilation system also helps to prevent mildew. Check your house for cracks that may cause moisture and humidity to permeate your home.

Another way to keep your house mildew-free is to make sure your main air ducts are dry and clean. This is one of the easiest way to transport mildew, so to keep this area clean is a time and effort-saving way to keep your whole house free of mildew.

0 comments:

How To Treat Unfinished Wood Furniture


Expensive furniture pieces can be amazingly affordable if you have purchased them as unfinished wood furniture. Besides that, these can be very beautiful art pieces. And if you like a challenge, you will love to treat an unfinished piece of furniture. Just imagine how rewarding it will be to finish an unfinished piece of art. Here’s how to properly do that:
  • Preparing. Get the furniture ready for the treatment. Wear a pair of gloves to protect your hand while doing this. Wipe any dust or dirt on the wood. Use damp cloth for removing more stubborn dirt and stain. Using wood soap is recommended for some stains. But spot treat the soap first before applying it on the stain.
  • Sanding. You can use anything that can smooth out the wood’s surface like random orbit sander and finishing sander but not a belt sander. Also, sanding should be done across the grain for more effective result. Sandpaper is fine for this. But your work will be faster with electric sander.
  • Dusting. Use a tack cloth to remove the dusts produced by the sanding. Other types of clothes are okay but the tack cloth is the most effective in dusting off the wood.
  • Treating stains. Removing the dusts will reveal the purer look of the unfinished wood furniture. Stains will be more visible on a sanded wood. Sand the stains again and then wipe off the dust. Repeat the sanding and wiping off until the stain is removed. It is important to remove the wood stains before proceeding on the next steps. More stubborn stain can be treated with wood chemicals. If not, you can cover the imperfection with wood paint.
  • Checking for imperfections. Wipe off the dusts again and then touch the furniture surface. It should be smooth to the feel. There should be no edgy surface. Nails should have been well hammered. Check how the wood pieces were put together. Applying more glue might be needed. Also apply filler on the nails so they won’t be very noticeable.
  • Sealing. Apply a good sealer for the furniture’s wood. Go to a local hardware store and ask for a good brand for the specific wood. Every sealer works best on certain types of woods. Applying a sealer on the furniture is often unnecessary. But doing so will give you smoother finish and easier painting job.
  • Painting. Wood absorbs primer and paint faster than other surfaces. So expect to apply more coats than it normally takes for concrete. Continue on applying more coats until you are satisfied. Settling on mediocrity will only give you mediocre result. You want the unfinished wood furniture to be as perfect as possible. Painting it well is the last part of the job but this is also the most challenging. Always wait for the current coat of paint to dry completely before applying a new coat. Finishing coat is best achieved with a spray paint than applying it with a brush.

Take as much time as you need to perfect the treatment of unfinished wood furniture. Who knows, it can be your legacy and a unique piece of art that will be passed on from generation to the next. Making a masterpiece does, after all, take a long time. So just enjoy the process and you will soon be rewarded with well-treated wood furniture.

0 comments:

How To Trim a Door that Rubs the Floor


Doors are supposed to swing smoothly and freely, away from the floor. If you notice that your door rubs the floor, you will need to do something about it. Not only does the sound is annoying; it can also damage your floor. If you have a carpet or a doormat near the door, the constant friction with the door can also damage these.
  • Act fast on the first sign of the door rubbing the floor. The usual cause of a door rubbing the floor is improper installation of the door. The door may be too big that it needs more area to swing freely. Another cause may be you’re your tiles or your carpet is too thick for the door to be able to swing smoothly. Trimming the door is easier than replacing your flooring.
  • First of all, you will need to trace back the occurrence of the rubbing. If the rubbing starts just recently, check out the hinges, as they may be loose. Loose hinges will make the door hang lower, thus all you need to do is to tighten the screws of the hinges.
  • If the tightening does not work, then you will need to trim the door for the excess portion that comes in contact with the floor.
  • Work on the trimming by closing the door. Inspect the door when closed, note if there are any uneven portions. Try to open the door and take note of the area that rubs against your floor. Use a pencil or a marker to mark the area.
  • Next, you will need to remove the door from the jamb. Unscrew the hinges so that you can remove the door. You will need someone to assist you in holding the door while you unscrew the hinges. Depending on the weight of the door, you may need more than one person to assist you.
  • Once you have successfully removed the door from the jamb, you need to lay it flat on a surface. Again, examine the door carefully and inspect the unevenness. At times, the wood may have chipped off, thus the rubbing against the floor.
  • If the uneven portion is insignificant, all you need to do is to sand it with sandpaper or an electric sander.
  • If the uneven portion extends to a greater width, then you will need a plane to cut off the area. Use the plane with caution and then sand the area for a smoother finish. Remember to use protective eyewear when you deal with sanding to avoid eye irritation.
  • When you’re done with the shaving and the sanding, inspect again so that you can give a final look before you put the door back. If you have cut off an area from the door, you might need to repaint the area so that it will not be noticeable. Allow the paint to completely dry before you put back the door as the paint may stain your floor.

Put back the door by screwing the hinges. This is the perfect time to replace rusting screws so make sure you evaluate the hinges well. Ask a partner to hold the door while you screw the hinges. Ensure that you tighten the screws to prevent the door from falling.

0 comments:

How To Use a Paint Stripper on Concrete Floors


A paint striper, as the name implies, is used to remove paint from surfaces. In simplest terms, paint stripers work by penetrating the paint, which will then lead to the swelling of the paint. Once the paint swells, the paint’s adhesion to the surface will be reduced and weakened, and it will then be easier for the paint to be separated from the surface. With that being said, here are some guidelines for using a paint striper, particularly on concrete flooring:
  • Know how to choose a paint striper. There are many different types and brands of paint striper. The first factor you would want to determine is whether you would want a paint striper that comes in paste, liquid, gel or spray form. You should also choose a paint striper that doesn’t contain VOCs (or volatile organic compounds) or HAPs (or hazardous air pollutants), as they are not only environmental hazards, but prolonged exposure to them could even cause respiratory ailments. It’s best that you choose a heavy-duty striper, so you could ensure that any type of paint will effectively be removed at the soonest possible time. Finally, ensure that you purchase paint striper that is specially formulated for concrete, and that it can remove the type of paint that was used on the concrete.
  • Clear out all materials from the floor. It’s easier to do this task if you don’t have to move objects around while using the paint striper. You should also prepare the area to make it well-ventilated. You might need to put in fans for this purpose.
  • Clean the concrete floor. This is especially true if the floor is severely dirty, greasy or grimy. The best heavy-duty concrete floor cleaner you could use is a tri-sodium phosphate cleaner (TSP). Do know that TSP is very strong, so make sure that you protect your hands with gloves and your eyes with goggles when using it. Do not use TSP for wooden surfaces, as TSP is strong enough to potentially damage it.
  • Apply the paint striper on your concrete floor. Use a roller or caustic-resistant brush for this purpose.
  • Wait for the paint striper to adhere to the paint in the concrete floor. You should watch out for signs that the paint has swelled; this should take anywhere between 1 to 12 hours. If after 12 hours and the paint still doesn’t seem to be swelling, you might need to reapply the paint striper to the surface once again. Before doing this, though, you might want to try scraping off a small spot on the floor to see if the paint can be lifted; if the paint can indeed be lifted, you wouldn’t have to repeat the process anymore.
  • Scrape off the paint. You could do this by using a large putty knife. Have a trash bag at hand so you could immediately dispose of the paint residue. This will take a lot of time so you might want to have several people along to help you with this step.
    If the concrete flooring is outdoors, a simpler way is to power wash the floor to get rid of the paint. However, you might still need to use the putty knife to remove the stubborn spots of paint.
  • Wash the floor using TSP. This will remove all the remaining traces of paint.

There you have it! These are some of the guidelines for using a paint striper on concrete floors. Depending on the surface are of the floor that you are working with, you should give yourself about half a day to accomplish this task.

0 comments:

How To Trim a Replacement Floorboard


Sometimes, no matter how much the house is taken care of, the floorboards give way to daily wear and tear. A stain here, a split there, a crack somewhere, these are just a few of a diligent housewife’s nightmares. To bring back the beauty of the floor, replacing the defective and ugly floorboard is the key. However, the replacement must mimic the original such that it will not look very much different from the other older floorboards. To make sure the right thing is done and ensure the beauty of the floor, follow these simple instructions.
  • Before removing the undesirable damaged floorboard, try to scout for the exact same floorboard currently installed. Take a photo of the current floorboard and bring this to the home supply store. Otherwise, you may opt to remove a piece of the original floorboard from an area where it will not be noticeable, say for example under the table or under a big piece of furniture.
  • If a replacement can easily be found, then proceed to the next step. However, if no similar floorboard is found, then think twice before removing the damaged floorboard. Sometimes, it is better to have it a little bit damaged rather than making it very obvious that it has been replaced. If not match can be found, just choose the floorboard with color and finish almost the same as the original.
  • Suppose a matching floorboard has been bought, clear the area of any important stuff and put layers of old newspapers over the other boards to prevent them from incurring any damage. Then remove the damaged floorboard and clean the area of any debris.
  • Hold the new floorboard slightly above the area of the old floorboard. Using a pencil, mark the new board so that you will be able to approximate the dimensions and trim the board accordingly. Mark only the areas that need trimming.
  • Try to position the board into the hole and see if it fits perfectly. If it does, then permanently attach it. If it does not, continue marking the board using a pencil. If many boards will be replaced all at once, line these up in the most accurate manner possible and mark as necessary.
  • Now, use a saw to cut the floorboard by following the pencil marks previously made. To ensure safety, use the more dominant and steadier hand to saw. To keep the floorboard stable, either clamp the floorboard onto a steel rod, or put it on top of a bench and use the legs (by stepping on it using one foot) to anchor it to the bench.
  • After sawing, use a sandpaper to smoothen and straighten the edges of the floorboard. This also effectively removes the unwanted and hazardous splinters.

Finally, place the board into the hole and make sure it fits perfectly. Adjust and cut as necessary. If more trimming is needed, it may be better to just use the sandpaper to ensure that you will not cut more than what is needed. Use the saw only once.

0 comments:

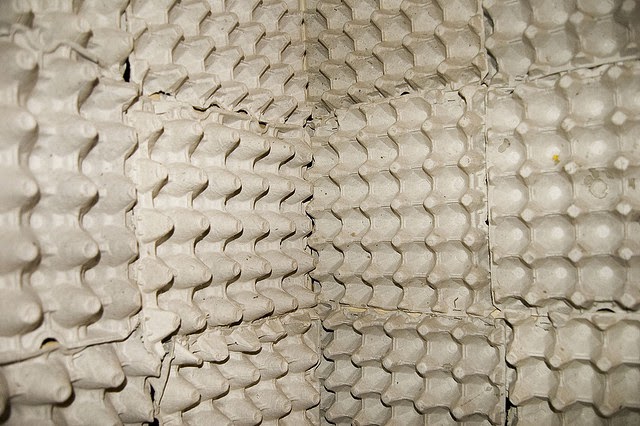
How To Use Egg Cartons to Soundproof


Much has been debated whether soundproofing a room using egg cartons really do work. Over time, many people have disregarded using egg cartons as an effective way of containing sound in a specific area. The concept behind using egg cartons, as known, is due to the reason that its shape makes sound waves bounce back rather than travel past a flat surface such as the ceiling or walls. This is why some amateurs and professionals alike cover an entire room with egg cartons with this belief in mind. However, other professionals have disregarded the use of egg cartons as sound travels through any thin, solid materials, which includes egg cartons. On the other hand, if you do not have much money to fully soundproof your room using costly materials, you can try using cartons to see for yourself if it really does work. Below is a tutorial on how you can use egg cartons as a means of soundproofing a room.
  • Preparation. The first thing you need to do is inspect the room that you plan to soundproof. Measure the size by using a construction-type measuring tape and get the dimensions of the room. Do not forget to include the ceiling as you will need to cover it as well. You will now need to collect a lot of egg cartons by basing the amount with the measurement of the room as opposed to each carton’s dimensions. From there you will have an idea of how much cartons you really do need. You will also need a glue gun to make the cartons stick to the wall. Either that or you can use a stapler to nail the egg cartons in the wall as well. Finally, you will need a ladder so that you may be able to reach the ceiling.
  • How to do it. Begin by starting off in a corner of the wall, by stapling or gluing one at the lowest portion in the corner. Work your way horizontally until you reach the end. Then, work your way to another level and make sure that there are no spaces in between the cartons. When you finish with all the walls in the room, you may proceed to installing the egg cartons on the ceiling. Similar to the walls, make sure that there are no spaces or gaps in between the cartons. Finally, add a thick layer of carpet on the floor to further improve the quality of soundproofing.

Since it is highly doubted that merely using a layer of egg cartons will work in soundproofing your room since sound travels through thin solid materials, there is another way to work your way around that factoid. If you still can afford a few more sets of cartons, purchase them. Add another layer of egg cartons to the existing layer on your wall and ceiling. Check for the quality by asking neighbors if the volume can still be heard. If yes, then add another layer until you reach the desired result. Remember, the thicker the layer is, the more successful you will be in soundproofing the room. Good luck!

0 comments:

Where To Find Birch Cabinets


Birch is a type of shrub of tree that grows on temperate climates. Birch wood is typically used for making furniture. It can also be used for the flooring of houses. This is because the timber can be cut into thinner pieces or strips called veneer wood. It is also used to treat some ailments because of its medicinal properties. Although there are a lot of uses for the birch tree, it is most commonly known for being used as furniture pieces, such as cabinets, tables and chairs.
Here are some of the Web sites where you can find birch cabinets:
  1. homeportfolio.com – This is a good Web site to visit if you are planning on redecorating your home or if you are in the process of replacing furniture. You can use the Web site to search for birch wood cabinets from different showrooms and manufacturers. This will be easier for you to find the type of birch cabinet that you are looking for. You can also pair your birch cabinets with maple birch flooring.
  2. merillat.com – Merillat is a Web site where you can find kitchen cabinets made of birch wood, cherry wood, hickory wood, maple wood or oak wood. There are several finishes that you can choose from when you choose birch wood for the cabinets. Some of the colors are cinnamon, natural, muslin, honey spice or moss with mocha glaze. This will give you a chance to match your cabinets with the theme of your kitchen.
  3. aristokraft.com – Aristokraft Cabinetry is one of the leading manufacturers of kitchen cabinets. When you visit the Web site, you will be able to see the samples of their birch kitchen cabinets. They also have other furniture, such as entertainment centers, desks, hutches and bar areas. You will be able to buy high quality cabinets without going over your budget.
  4. palmcoastcabinets.net – This Web site offers kitchen cabinets made of different types of wood. You can purchase birch cabinets, hickory cabinets, oak cabinets, maple cabinets and more. They also sell countertops for both residential and commercial spaces. You can visit the Web site so that you can see the showroom of the company. You can also read on how to take care of the cabinets.
  5. oakwoodveneer.com – The Oakwood Veneer Company provides different types of veneer wood, including birch veneer. You can purchase birch veneer from this Web site to use for your cabinets at home. The birch veneers that they have include flat cut, red and rotary. They are hardwood panels that can be used to construct different furniture.
These are some of the Web sites where you can find birch cabinets and birch wood veneers that you can use to construct cabinets. It is important that you know the different qualities of wood so that you can choose the best type for specific furniture. Birch wood is ideal for different items as the wood can be finished to fit your style. You can read more about birch wood from the Internet so that you can see what its other uses are.

0 comments:

How To Survive a Kitchen Remodel


You think the in-laws can be tough on a marriage? Try a kitchen remodel. Or better yet, ask the in-laws for advice on your kitchen remodel. Though rumor has it that home renovation is one of the leading causes of divorce, there are ways to minimize the effects of a kitchen remodel. Here they are:
  1. Set up a temporary kitchen. I know you have visions of eating out regularly, sushi one night and Thai the next. You see your kitchen remodel as an opportunity to sample the international cuisines you've been hankering for. Let's get real. Remember those days when you come home from work exhausted and all you want to do is crawl into bed? Or those days that the term "PMS" do not quite do justice? Your temporary kitchen is for those days, not to mention for breakfast, lunch and the sake of the kids.
  2. What you'll want in your temporary kitchen. Stock your temporary kitchen well to minimize the disruption--as with all jobs, the right tools will take you far.
    • Refrigerator. Your refrigerator can be large or small but don't even think about trying to go without one. This is where you will store the cold beer that you will need on more than one occasion.
    • Sink. If you don't have a sink in the space you plan to use as a temporary kitchen, try to be as close as possible to one. Trying to schlep dirty dishes around the house without spilling their leftover contents on the floor gets old fast.
    • A good representation of pots and pans. Observe which pots and pans you use regularly and make these a part of your temporary kitchen. There's nothing like trying to make an omelet minus an omelet pan.
    • Toaster oven. If you think that a microwave will suffice for your cooking needs, think of chicken skin that is not crisped, cheese that is only half-melted and toast that is not, well, toasted. You will begin to see that little ole' toaster oven that you never paid much attention to in a whole new light once it takes up residence in your temporary kitchen.
    • Hot plate. The hot plate will be your burner. Think spaghetti, oatmeal, rice and caffeinated beverages.
    • Grill. If a grill is not already one of your food preparation mainstays, it may become one after your kitchen remodel. If you have an extra burner or warming area on your grill, you can cook your vegetables or warm your bread there.
    • Microwave. Chances are that the microwave is already one of your kitchen regulars. You'll start to cook foods in it that you haven't previously, a process you might even keep up once the remodel is over.
    • Blender. You don't have to be wasting away in Margaritaville to want a blender. Kids love their smoothies. For some fun recipes that include the irresistibly-named Blind Date Pudding, check out FreedomYou.com. 
    • Plates, utensils, glasses and napkins. The point of your temporary kitchen is to maintain some semblance of civility in your eating routines; to do that, you'll need the proper implements.
  3. Consider setting up your old (or new) appliances in your temporary kitchen. If you've bought new appliances or have yet to get rid of your old ones, consider setting them up in your temporary kitchen. No point in having a brand new microwave convection oven in a box in your garage when you could be putting it to good use roasting chickens in your temporary kitchen.
  4. Install temporary flooring. If your temporary kitchen is in the basement on a cement floor, consider adding some temporary flooring to warm your space up. Working on a cement floor can be a dismal experience; it doesn't cost much to at least lay down some vinyl flooring to improve the experience.
  5. Make sure your lighting is adequate. There are practical aspects to good lighting (you'll need to be able to see the food you're cooking) and aesthetic aspects as well. If the temporary kitchen does not have overhead lights, make sure that you have adequate light sources elsewhere. Alternatively, if your overhead light is just one giant bulb, get a cover for it to soften the effect.
  6. Seal your kitchen off. While your new kitchen is under construction, seal it off from the rest of the house to minimize the disturbance. 
  7. Strategies for eating out. If you will be eating out regularly, rotate the choice of where to go among different family members on a regular basis so resentments do not begin to build. And of course, there must be something for everyone-including the vegetarians in your family-at the restaurants that are chosen.
  8. Consider the season. Planning a kitchen remodel for mid-November might be just the ticket in San Diego but would virtually guarantee cabin fever if you lived in Seattle. Gauge what activities your family will be engaged in and plan accordingly. Of course, everyone's favorite season for a kitchen remodel is summer, so if you're holding out for one contractor in particular, your chances of landing him are better in the shoulder season.
Remodeling a kitchen can be a challenging process. But by following the tips above, you can maintain a dining routine that will help to minimize the disruption.

0 comments:

How To Install a Stainless Steel Sink


There are a two basic types of stainless steel sinks: undermount and self-rimming. The undermount is used in installations where the countertop material is the same all the way through such as granite or a solid surface (i.e. Corian). It's usually installed by the countertop fabricators because of the liability in drilling the counter material for the anchors that will be used to mount the sink. After the undermount sink is attached to the c-top, the rest of the install is the same as the self-rimming sink, which is the type of installation that will be described here.
  1. Determine your sink configuration and finish. There are a few options available in stainless steel finishes with the most popular being the brushed and mirror finishes.The mirrored finish is very bright and shiny, but as you would expect, it shows water spots very easily.
    The quality of a sink is also determined by the thickness of the steel (known as the gauge of the steel) -- the lower the number of the gauge the thicker material. Typical gauges range from 18ga to 22ga.
    Typical residential sinks come in a single, double, or triple bowl configuration, with the bowls of equal or unequal size depending on the needs of the consumer. Some sinks come with a small bowl made to accommodate a food disposal.
    Sinks come drilled for the specific faucet to be installed on it. Determining factors are whether the faucet is single or two handle, has a sprayer incorporated in the spout, or there is a soap dispenser, all of which will determine how many holes you will need punched out of the sink.
    Note: Most applications have the faucet mounted to the countertop on an undermount sink and the faucet mounted to the sink on the self-rimming sink.
  2. Cut out the countertop (laminate or solid surface). If your countertop is being fabricated for you, the fabricator will gladly cut out the sink for you for a modest charge. You need only drop off the sink template (found in the box) or sink itself if there is no template. Many fabricators have a library of templates and let you fax over your model #.
    Mark your cutout on the c-top with the template if you are cutting it yourself. If you are re-using a sink and don't have a template, then mark the width and length of your sink onto the c-top, being careful to copy the radius corners. Now make another line 1/2" to the inside. Use a compass set to 1/2" and follow around the outside line with the point. Wipe off your first, larger line.
    Using a bit larger than your jigsaw blade, 3/8" to 1/2", is usually good, drill two holes located in either of the opposite corners, making sure that your hole stays inside the line. With masking tape, mask off around the perimeter of the line to protect the c-top surface.
    Insert the jigsaw into one of the corners an cut toward one corner, then use the same hole to work in the other direction. Be sure to support the cutout on the opposite end before finishing the final cut so the weight of the material doesn't snap the piece off prematurely.
  3. Mount the sink. Make several long "ropes" of plumber's putty by taking a ball of it in your hand and spinning it between your palms. Place the long pieces of putty around the edge of the cutout, connecting them into a continuous seal.
    Pick up the sink and set it into the hole. If the hole is cut right, it will be 1/2" smaller than the sink, and the rim of the sink will push down onto the plumber's putty.
    Crawl under the sink with your back on the cabinet bottom, reach up and slide clips into grooves on the underside of the sink rim. Using a slot screw driver or a nut driver, whichever type of clip you have, torque down on the screws until they start biting into the countertop, pulling the sink tight and usually squeezing out some of the putty on the top side.
  4. Plumb in the drain. Install a basket strainer (usually sold separately) in the hole at bottom of the sink by putting down another "rope" of putty around the drain hole then pushing the basket down into the putty, squeezing some out. More will squeeze out as you tighten the nut onto the basket on the underside of the sink.
    Use tubular brass or PVC drain fittings, starting with a tailpiece from the basket, into a p-trap (if the drain is at the wall) or an s-trap (if the drain is at the floor) and tighten the slip nuts first by hand, then with a large channel locks. Do not over tighten as the brass and plastic can easily strip out destroying the threads.
    Hook up the food disposal in place of a basket strainer if needed
  5. Hook up the faucet. There a oodles of faucet manufacturers out there that have their own idiosyncrasies in their installations. There are some commonalities, though.
    Mount the faucet to the sink. Some faucets come with a gasket that stops water from running between the sink and the faucet. If yours doesn't come with a gasket, the use the plumber's putty around the faucet holes before mounting, pressing the faucet into the putty.
    Connect the hot and cold supply lines from the faucet. Some faucets have supplies connected to them and can be fastened right to the shut off valves inside the cabinet, and some need the supply lines added to them.
  6. Clean up. Using a small slot screwdriver or something similar, push the edge of the screwdriver around the edge of the sink, digging out the excess putty
    Repeat this process for the baskets and faucet base if necessary.

0 comments:

How To Apply Concrete Sealer and Stain


When do you need to use concrete stain and sealer? Well, if you have recently completed a project using concrete, you may need to seal the surface to prevent water and other seepage. Additionally, some concrete projects will receive an aesthetic "lift" if stained properly.  Whether it is a paver driveway, an exposed aggregate pathway, concrete flooring, or a patio, you will want to consider the benefits of sealing and staining your work. Here are some tips.
  1. Concrete Sealer: Why use it? Concrete sealers are needed for projects that require the material to be impenetrable, or at least, less penetrable than unsealed concrete. Concrete sealers are finish concrete floor coatings used to protect the concrete. Sealers act to prevent damage from traffic, water and chemical agents. Sealers reduce the porosity of concrete and prevent water and dirt from getting into the concrete. Many people use epoxy concrete sealer.
  2. Types of Concrete Sealers: Film Formers. Film formers inhibit the penetration of water and impurities by creating a barrier on the concrete's surface. Since many of these film formers create a luster or shine on the surface, they are often used to enhance exposed aggregate colored concrete.
  3. Type of Concrete Sealers: Penetrates. These sealers penetrate into the concrete. They get 1 to 4 millimeters into the concrete to increase water repellency. Unlike the film formers, they do not leave a sheen or gloss.
  4. Which Type of Concrete Sealer to Use? This depends on two factors: What do you want the surface to look like and what type of maintenance are you willing to do? If you want a glossy finish, go with the film formers. If you desire a matte finish, use a penetrate. If you need a slip-free surface, stay away from film formers. To keep maintenance manageable, you will need to choose the correct product. For instance, for sealing a driveway, you need a coating that repels grease and oil and prevents water penetration. To make it easier to care for an interior floor, use a coating that dustproofs the surface and resists scuffs and staining.
  5. Concrete Stains: Why Use Them? Acid concrete stains add aesthetic value to your concrete. Many consider concrete staining a perfect substitute for painting, or adding carpet or wooden floors. A concrete surface can be heavily brushed or lightly smoothed. A design can be created to look swirled, tinted, geometric--basically any design or pattern can be created. Homeowners often prefer to use stain on concrete since no matter how discolored the surface is, any blemishes highlighted by the stain will simply add to the character of the finished coating.
  6. One Step Concrete Sealers and Stains: There are products that perform both the sealing and staining process. Products like Color n' Seal serve this dual purpose. They are semi-transparent stains as well as a protective acrylic coating. Most products do not perform both functions, so make sure to read the manufacturer's label thoroughly before applying to your surface.
  7. Concrete Sealer Application: Tools and Materials. You will need protective clothing, a water bucket, a stiff brush, concrete sealer, goggles, a paint roller, rubber gloves (neoprene), a fan, a concrete cleaner, a paintbrush, and a protective covering for your nose and mouth.
  8. Concrete Sealer Application: Floor Prep. You must clean the concrete surface before sealing. The floor must be free of dirt, grease and oil. Use a stiff scrub brush, concrete cleaner and degreaser to clean the floor. For obstinate stains, allow the detergent to coat the floor for 10 to 15 minutes after scrubbing and before rinsing with water. Wear protective clothing, use rubber gloves, goggles and a face mask while cleaning, as many sealers contain dangerous chemicals. Use a fan to ventilate the area you are working in.
  9. Sealer Application: Apply Sealer: Test the sealer in an inconspicuous area. If it looks good, continue. The easiest way to apply sealer is with a medium-nap paint roller with an extension handle. Use a regular paint brush to cut in the edges. Work the sealer into the surface and keep the substance from puddling anywhere on the surface. Your goal is to achieve a thin uniform coat over the entire surface. Typically, you only want to do one coat of sealer. Allow the sealer to dry as directed, usually for several hours.
  10. Clean Up: Wash up with warm soap and water immediately. Throw away all used material.
  11. Application: Stain. Concrete stain solutions are applied by brushing, spraying or rolling. The most effective way of applying these substances is by spraying the surface with a plastic garden sprayer. This allows the sealer or stain to spread evenly without a puddling effect. Use the same protective clothing and equipment as you did when applying the sealer.
Finishing a concrete project with the correct sealer and stain (if desired) is a crucial step. If the sealer is not applied correctly, or if you use the incorrect material to seal the surface, your concrete will suffer and may need to be repoured in the immediate future. To avoid future problems, make sure you always read the manufacturer's label and follow the instructions to a tee. Use the guidelines above, but be aware that every product is slightly different and may require variations in the application process.

1 comments: