Showing posts with label Wall. Show all posts

How to Decorate Your Walls With Wall Decals

Decorating our homes, offices and surroundings adds a new appeal to the spaces we are used to seeing every day. The same old bedroom wall, dull colored living room, and grey office boardroom can be monotonous to look at. Your surroundings can influence you in a lot of ways. Adding something new to decorate your surroundings can reflect positively on your thoughts, mood, and imagination.

You may decorate your living room in a way that gives a peaceful and soothing sway when you enter your house, or enrich the kid's room with creative and insightful decorations to help them learn and be creative. With the new technology you can easily get affordable, space saving and easy to install decorations themed for your homes, workplaces, stores, and even outdoors.

Living in an urban dwelling usually means that space is expensive and rented. This is a challenging situation for tenants to decorate keeping in view both the limited space and strict rental agreements. The restrictions rule out a lot of decoration options which occupies space or requires change to the physical surroundings. The only option left is to apply decorations to the walls. The best and most affordable option which can cater to all the rules and regulations are vinyl wall decals.

Wall Decals are vinyl stickers, which are easily to paste on to the walls without any extra effort. They are very easy to use, maintain and remove. They are high quality vinyl stickers which are low cost, durable and health-friendly option to decorate your walls. Putting them up is very easily and requires no technical knowhow. They are very thin, with a smooth texture and appear as if painted onto the walls. Another nice thing about Wall Decals is that it can be easily removed without leaving any marks on the walls. It is an ideal option for tenants who can easily remove the wall decals when moving and paste them in their new premises.

Wall Decals are available in numerous colors with limitless shapes and designs. They are perfect space savers for small houses and apartments. If you are a nature lover, you can decorate your walls with beautiful decals of flowers, trees and landscapes. For kids, parents can put up wall decal designs with zoo animals, alphabets, numbers, nursery rhymes, height charts and cartoon characters.

To make the living room livelier, the wall decals can feature a movie scene, inspirational quote or beautiful scenery. Bedroom walls can take a facelift with nice scenery or beautiful headboard decorations. In the offices vinyl wall decals can be used to decorate walls with educational, thoughtful and interesting stuff for employees' motivation. World map wall decals on meeting room walls, cafeterias or help desk walls can be an impressive display of company's worldwide business operations.

Interested in learning more about Wall Decal designs and concepts? Head out to online archives and choose from a nice catalog of your choice from a variety of design options. In addition to a wide variety line, good vendors also provide tips and suggestions on their application in easy steps.

Define Borders With DIY Wall And Ceiling Textures

Did you know that there are numerous ways to make the ceiling and walls of a home look more stunning? You can create wonders as well as tricks on these important parts by simply adding the right kind of textures. DIY wall and ceiling textures can be easy to those who are willing to learn - so, are you ready?

While the ceilings and walls are just some parts of your home, they play an important role in improving your home's overall appearance. Here are some guidelines on how you can create quality wall and ceiling textures -

Prepare the Needful Materials

First, you need to choose from the different varieties of textures ranging from thin, medium and thick sets. Be sure to measure the ceilings and walls where you will apply the textures on.

Buy ample texture supplies such as a trowel, joint compound, a basin that comes in the right size so that you can easily mix the primer and the compound. Make use of large paper or plastic sheets on your floor. These will catch the mess that you are about to create because of the texturing project. Remember to tape the edges of the plastic or paper sheets so that they won't budge once you start the task.

Next, remove the stains on the ceiling and on the walls, making sure that you cover big cracks with a tape. You can go back to these and texture them later.

Time to Get Started

As soon as you have checked that you have prepared and purchased all the necessary materials for the texturing process, then you can begin with the job.

Start by rolling the water-based primer all over the ceiling and onto the walls. Wait until they are completely dry before you move on to the next part of the process. While you are still waiting for the primer to dry, try to experiment on a piece of cardboard or scrap wood the kind of texture that you would want to achieve. Practicing your strokes will minimize any errors that could occur once you start texturing. Be sure to achieve uniform texture throughout the surface.

Once the primer dries, dip the trowel in the bucket then apply the joint compound onto the ceilings and walls. Remember the strokes that you did on your practice cardboard surface. Be sure to spread the compound evenly. Repeat the strokes of your trowel using a fanning movement.

As you place more pressure, remember that the texture will become thinner. The lighter your hand is, the heavier the texture will become. Make sure that you use the same procedure throughout the covered area in order to get a uniform look.

Paint only once the texture has completely dried. You will be able to tell if it is already dry if it is already chalky. You may want to use the skip trowel or the orange peel (knock down) process of texturing. The orange peel process involves spraying a thinned drywall compound to the walls and ceilings. What you achieve is a rough texture that is quite similar to the orange peel.

The skip trowel process can be achieved by spot spraying thinned drywall compound on a clean surface. As soon as the spots have stuck, you can then make them finer by flattening the tops of bigger spots. This whole process brings about flat, small and smooth areas all within the texture.

Decorative Wall Mounted Wine Racks

A wine rack is a practical item needed for proper storage of wine, keeping the cork in constant contact with the wine, so that the cork doesn’t dry up or become mildewed. But far from the utilitarian wood racks used by vintners and owners of expansive wine cellars, wine racks in handsome wrought iron or wood can add to the style and décor of a kitchen, dining room or entertainment room. It doesn’t matter if you love streamlined contemporary style, or the romance of Old World French Country or Tuscan style, there is a wine rack that will enhance your decor.

Wall mounted wine racks have a bonus space saving feature, since they do not take up precious counter space. And keep in mind that they can be mounted on any vertical space, such as the end of an upper cabinet or a narrow wall between the kitchen and dining area, making the most of ‘dead’ space.

Here are two style ideas on how to enhance your décor and create a focal point with wall mounted wine racks.

Step 1

Focal Point in a Home Bar. If you have a  media room complete with a bar for entertaining, why not take your décor from ordinary beer signs and race car posters, to a new level of elegance and sophistication? Create a focal point on a large wall with a three wall mounted wine racks. Space them in a triangular fashion with the center rack being the highest, and the other two parallel with each other and off to the side. Arrange another piece of wall art beneath the tallest wine rack. For a Tuscan feel, choose a beautiful painting or framed print of the Tuscan countryside or a trattoria nestled in a picturesque piazza. You could also decoupage labels from your favorite vintages on foam board then mount your collage in a sophisticated frame. Wineries often carry large posters of special or yearly released vintages. These can be elegantly framed as well.  Add hanging pendant lights that complement your style to illuminate your display.

Step 2

French Country Dining Room. Classic French toile patterns and an elegant wrought iron wall mounted wine rack work in harmony to transport your dining room to the magnificent French countryside. Start with walls in a soothing shade of pale sky blue or warm yellow, with wood trim accented in buttery cream. Create a focal point above a server with a black wrought iron wall mounted wine rack. Beside it, arrange a grouping plates and platters hung on the wall with individual plate hangers in French country themes like sunflowers or roosters. Carry the theme to a black wrought iron chandelier with fitted with individual bulb shades in black and white check. Add black and white toile chair cushions to make this room elegantly unique. Arrange white pottery on a black hutch, an antique silver tea set and tray on the server, and a bowl of fruit on the table for finishing touches.

How To Choose Wall Art Equipment and Supplies

Decorating a home can be very exciting and challenging at the same time. Because your home is reflective of your personality, your designs and concept should be appealing and personalized without sacrificing good aesthetics.
While the entire house area and the bedroom are the two most favorite areas to decorate, walls have always been preferred to be designed first because a majority of the concept would have to blend with your wall space when you are designing. The color scheme and the art concept are the things that dictate the overall look of your home.
Here are some things that you can use in decorating your walls. Your local interior design store should be able to assist in finding these items.
  • Wooden decor have always been a top favorite among professional, amateur and self declared designers. Wood art is a timeless design - and can work with any theme, whether country or contemporary. It is easy to work with and to manipulate. There are also various colors or shades of wood available that you can choose from depending on your overall color scheme.
  • Cloth is very flexible when it comes to design. It can serve as a substitute for costly paintings. You can "personalize" it with your own design; you can wash it - making it easy to maintain, and you can put embroidery with the design of your choice on it.
  • Stainless Metal/Steel has rich texture and the color gives a commanding new look to any wall. Functionally, it can support the weight of other decor or serve as reinforcement for your wall.
  • Porcelain foil can be used to cover or wrap old pieces and give it a new look.
  • Lamps or other light decor not only serve for aesthetic purposes, but also are very functional in brightening up or setting the mood for your room.
  • Thermopal furniture board can be the base for your photo wall.
  • Regular art equipment and tools such as different types of adhesives, different shapes and sizes of shears, pins and strings, are some things you can use in decorating your wall. You can work with almost any art equipment you can find in your local art store. Just remember that your tools can work well with your chosen materials so as not to ruin your decor or art piece while you are working on how to put it up your wall.
It is important to note that your walls need not be punched and poked with every decoration. Avoid making holes needlessly, and only do so once you have laid-out the total design for your walls. You cannot just make a hole and repair it back the way it was. Your walls should remain in good condition throughout your design or makeover process.
Let your personality and creativity shine through your wall decorations. Not only will they bring comfort, satisfaction and pride to your home, but they are also good conversational pieces as well. Just make sure your other designs and color scheme will complement your wall design; online courses in art and/or design can help you with this..

How To Install Knee Wall

A knee wall is just the thing to complete an unfinished attic or dormer space.  It is easiest to do this kind of project with a nail gun.
You will need to measure carefully and take notes. A scale drawing will not be necessary, but a scratch pad will come in handy for writing down measurements and possibly sketching some of the angles.
You will need a bottom plate, which is just a finished two by four that runs the length of the wall. The plate will have to have short studs, which must be aligned to the existing rafters where you are installing the knee wall. The height of the wall determines the length of the short studs.
After determining the length of the bottom plate, cut it to the proper length. Mark it at each place you are going to nail a stud. The studs will line up with the existing rafters and be nailed to them on an angle.
To figure the studs, measure from the floor up to the height you want the knee wall to be and mark the rafter.  Use a level, standing with one end on the floor and the other touching the mark. When the level is plumb mark the floor by the bottom of the level.
The top mark will align with the pointed side of the stud and the bottom will align with the outside bottom corner of the stud.
Now, square cut the stud long enough to sit on the floor plumb and go beside the rafter and above the mark. Make sure it is plumb.
Draw a line on it where it lays against the rafter. When you have it marked cut the slanted end leaving the line.  You should be able to see the line on the short stud after you have cut the angle.
Square cut one and one half inches off the other end. The short studs will be pointed on one end and square on the other.
All of your short studs will be the same size.  Use this one as a model to make all you need.
Nail all the square bottoms to the plate, then move the plate into place. Plumb the studs on each end and tack the tops to the rafters and the bottom plate to the floor.
Recheck for plumb and proper placement. When you are sure everything is right nail the plate first and then all the studs permanently.
If you are going to install drywall, you may need to add extra blocking as needed. Blocking is short two by fours nailed between rafters and studs.
Be sure to insulate and do any wiring before adding the drywall.
Your knee wall will make the room more useful and will give it a nice finished look. It is a great place to install speakers and add extra storage.

How To Fasten Objects to a Wall

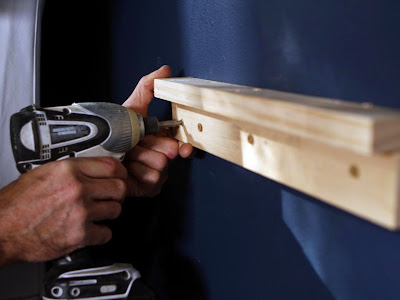
Unless you are satisfied with walls bearing no pictures or other hangings, sooner or later it will become time to fasten an object to the wall.  Although it is not difficult to properly fasten an object to a wall, it is very important to do it correctly and follow several critical steps.
First and foremost, you need to consider what type of object you would like to secure to the wall.  How heavy is the object?  Is it breakable?  Will you be adding more weight to the object once it is fastened to the wall?  The type of object is going to determine what additional steps will be required to properly fasten it, so be sure to think carefully during this step.
The second step is to decide where you would like to fasten the object and on which wall.  What type of wall is it going to be secured to?  For example, types of walls can include sheetrock, masonry/brick, wood paneling, and tile.  Each type of wall will have its own requirements, so read carefully below to ensure that you are following the proper procedures.
Sheetrock - It is best to fasten objects to a stud when possible, but if you are unable to...then there are ways to secure items to sheetrock.  If you are installing in sheetrock, you will need drywall screws and holders.  These are simple to use, and further instructions are on the back of the package.  For light items, you can use a picture hanger that will nail directly into any spot on the sheetrock.  This method is best used for items under 30 pounds.
Masonry/Brick - Unless you are going to be installing something with adhesive, your best bet to fasten an object to a wall made of brick is to use concrete screws.  Screw these directly into the wall for best results.
Wood Paneling - When fastening an object to this type of wall, either use nails or screws and secure them to studs beneath the paneling if possible.  Long screws can be used as well.
Tile - Fastening an object to a tile wall can be very difficult, so be careful not to crack the tile.  A screw specifically designed for use with tile should be utilized.
As simple as fastening an object to a wall can be, remember that it is imperative that you take your time and do the job correctly.  Nothing is more frustrating than watching your entire work tumble to the floor.

How To Prepare a Wall for Painting

Any professional painter will tell you that proper preparation of the walls before getting started painting is absolutely essential. A clean, smooth wall will be easier to paint, will use less paint, and will give you a nicer finish. Fortunately, preparing a wall for painting is very simple, and the time you spend in preparation will ensure a quality paint job and the protection of your home, as well as provide for the safety of yourself and others. 
Following these basic steps will help you to prepare your walls for painting: 
  1. Remove paintings, photos, or other decorative items from the wall. Take down curtains or window coverings, and all curtain rods or other fasteners.
  2. Turn off the electricity and remove everything else from the walls, including switch plates, outlet covers, and light fixtures or lamps. Wrap any exposed wires safely in plastic, or tape securely with electrical tape.
  3. Use painters tape to cover the edges around windows, doors, and to cover trim pieces. (You can use masking tape for this, but painters tape is comparable in cost and can be removed more easily.) Alternatively, you can remove trim pieces using a pry bar and wooden shims.
  4. Repair any holes or cracks in the wall. For small holes, like those caused by nails or tacks, you can quickly fill them with putty (or a simple paste of water and flour if you're in a bind).
  5. Once any wall defects have been repaired, vacuum the walls or use a dry shop cloth to remove any dust. Then, using a tri-sodium phosphate (TSP) solution and a big sponge, clean the walls. *Remember to wear rubber gloves during this step.
  6. Rinse the wall with plain water, and allow it to dry completely.
This is all you really MUST do to prepare a wall for painting, but it is highly recommended that you always apply a good quality primer that is appropriate for your surface (i.e., drywall, wallpaper, etc.) before actually applying the first coat of paint. 
Of course, if you are painting a wall that has old or damaged wallpaper on it, or that has very serious cosmetic defects, there will be additional work required to ready those walls for a good paint finish. However, the simple steps outlined here should be effective in preparing most walls for painting, and remember, a little bit of preparation can make all the difference between a paint job that revitalizes your room, and one that just looks crummy.