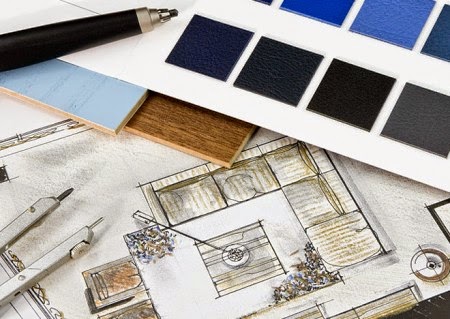
Room dividers are becoming more and more common in households these days. This is due to the open concept in modern living, where living spaces tend to blur into the next. Room dividers serve the purpose of establishing a much needed sense of separation and privacy. Room dividers aren’t actual walls, but panels. They serve the purpose of giving us at least a semblance of partition, which helps ease our minds about our privacy.
Room dividers are basically meant to divide the spaces inside the house into different functional areas. They are widely used by interior designers and architects to simplify and yet amplify the functions of a house. They also provide a decorative atmosphere and add character to a room. Made from a large variety of materials depending on the creativity of the designer, room dividers come in different forms, sizes and functions. There are many variations on room dividers such as portable room dividers, cubicles, pipe screens, drape screens and shoji screens. Their uses depend on the function of the room being divided.
Dividers are not only a way of separating space, but they also serve as ways to personalize your surroundings. Here are some ideas you can try out. Here's how to use a room divider.
- Match the room divider with the décor. The décor of the room is always important and adding decorative room dividers can help. The design or the color of the divider must match the surroundings. Sometimes, the construction or materials used have to be considered. If you have a divider that fits the theme, but not the color, check the material. If the material can be painted, or if you can redo the finish, visit a paint shop to acquire the paint or varnish needed. You can also see if the shop can do the paint or varnish job for you.
- Decorate the room divider. Sometimes a room divider just looms and looks out of place. If the divider is sturdy enough, some items can be hung on it. Pictures, artwork and trinkets can add to the appearance of the divider. Doing this can add to the personality of the room, and make the room divider more a part of the home.
- Create your own room divider. A quaint and chic homemade room divider can be built, if done properly. It will also be a very personalized piece of furniture, being made by your hands. There are different materials commonly used in making homemade room dividers. For the hanging foundation, you can choose from chains, rope, string, twine, fishing line or ribbons. Then you can hang trinkets, beads, fabrics, records, or just about anything to add design and flair to your divider. You can also simply drape a fabric to serve as a room partition. Or you can drape a fabric and decorate it with stitching, or rhinestones. You can also make modern room dividers if your house has a modern design to it.
There are many ways to personalize your room divider. You can customize the one you already have to fit better with the surroundings, or you can go all out and just make a new one. In any case, the room divider will serve its purpose and may serve as another interesting accent piece to your home.
Feng Shui masters believe that certain things in your kitchen should be organized in a specific way. The kitchen is the place where the masters believe to be the center point of bountiful grace since this is where food comes in and sustains you. The more your kitchen is clean, warm and welcoming, the more you are healthy and well rounded. These rules will let you attract good energy and will bring you remarkable change to your wealth and your health.
- Location of your kitchen. In Feng Shui, the home signifies the body and the kitchen represents the digestive system. According to the traditional Chinese system, your main door should not open to the kitchen. It is like saying you should not see your stomach through your mouth. The ideal location of your kitchen should be at the near back of your home. An area where it is not visible from the front door. The kitchen should also face east. This will enable the morning sun and the positive energy “chi” to permeate into the house in the early morning hours.
- Stove location. You should be facing your living room or dining room when using your stove. In Feng Shui, the frequent usage of your stove symbolizes your potential for growth in all aspects in life.
- Cutlery. Your knives and cutlery should not be exposed in the kitchen, except when you are using it. These blades should be kept in a drawer not on the kitchen counter. Anything sharp should not be on display in your kitchen. This represents the cut of the good energy into your home.
- Keep fresh food. Always keep your food in your kitchen fresh. Your refrigerator should always have bountiful supply of food. Remember not to keep rotten or spoiled food in it. According to Feng Shui, filling your kitchen with fresh food will give you emotional and nutritional health. You can put fresh fruits in a bowl on the kitchen counter to gather good energy.
- Cabinets. Keep your cabinets free from clutter. A disorganized cabinet symbolizes excess problems and burden in your home. Assign a cabinet by item. Always keep same items together in one place. You should keep only one cabinet for junk. You can store extra utensils, keys or anything that does not categorize on your assigned cabinets.
- Provide a seating area. The kitchen should be the embodiment of warmth in your home. Designate an area for a comfortable seating and informal dining area. These seats should be comfortable enough to get you and your guests through small talks. Keeping the kitchen comfortable and accommodating symbolizes the support you have from family and friends. When there is love and support, good energy is always attached to it.
- Color. Aside from the arrangements and the organizations, the color of the kitchen is another vital rule in Feng Shui. You should use colors of red, green and yellow. These colors are considered good luck and health.
Applying these rules to your kitchen will promote good physical well being. Redefining your kitchen organization with Feng Shui is one of the most inexpensive kitchen make over known. If you are not ready to do extreme makeovers, a simple rearranging by the rules will suffice. Now you are prepared to receive all the positive energy Feng Shui can manifest for your home.
We were designed to live in a beautiful environment called Paradise and were given the task to take care of it. Fast forward to the present day, and we already know we failed on both counts. That’s why we have increasingly alarming rates of global warming, but like everything imperfect in this world, it is never too late to reverse the damage. We have been warned so let’s take heed by thinking Green.
Green isn’t just a color anymore. It’s today’s answer to global warming. It begins with conservation, finding renewable sources of energy, and building eco-friendly green homes.
If you want to make a difference by constructing your own green home, consider the following:
- Talk to an expert. Building your green home is a technical and precise construction project. A skilled architect with the knowledge, basics, benefits, and practicalities of building green can present an architectural design for your approval. After some serious discussion on the matter, he should be able to design a blueprint that will be your guide in building your green dream home.
- Get up to speed on building regulations particularly those that have to do with building green houses.
- Look at other green house designs that are already completed. Talk to the owners and listen to their inputs. Take note of their recommendations and testimonials about living in their green home.
- Consider your design aspects like insulation, materials like recycled steel, straw bale, packed earth, timber or oak for construction, electrical appliances, lighting, insulation, energy source, recycling, and water. These design aspects should not only fit into the blueprint for your home but also should extend to and include your porch design, your garage design, and even your toilet design. Further, the materials needed for your green house should be locally available.
- Your architect should be able to assess the land you plan to build your green house on. This is an important aspect of designing your home so it doesn’t alter the condition of the landscape or the land’s ecosystem.
- Like all green building designs, the use of space is maximized even for a multi-level house. Consider building both above and below ground.
- Employ solar power and install solar panes. Once again, these should be included in your architectural design and blueprint pre-construction.
- Use recycled steel as your main construction material and renewable timber as your secondary construction material.
- Shape up or ship out. Try to include a small man-made lake into the design. Rainwater from your roof can be fed into the lake which in turn can be used to water your plants or vegetation.
Building your green home is all about sustainability. This planet was made with everything that can sustain and promote life but we humans have forgotten to give back what we’ve taken. Our planet may be large but our resources are very limited especially with the ballooning global population. There is no time but now to act and reverse the damage. Let’s begin by building healthy homes, yeah?
With the economy in an almost unprecedented slowdown, the number of people designing their home interiors and acquiring their own design tools is definitely on the rise. There are just way too many resources and sources of inspiration on television and the internet. Everyone wants to be involved in his own home design. There are also a lot of books on house design both in terms of landscaping, as well as the interior and exterior aspects of home aesthetics.
Here are some of the of the home interior design tools that you may consider for fixing your own house.
Books are always a good source of information. Most design books have lots of photographs in them to give readers an idea how a concept is translated to a real space. This should also be a great way to be exposed to new and revolutionary philosophies in design. Books broaden the armchair interior designer’s horizon by offering new approaches to design that may be governing the laws of style in other parts of the world.
The internet is also a great source of new trends and design ideas. There are plenty of websites and “how to” pages devoted to help amateur designers and builders conceptualize and construct their own dream rooms and homes. It shouldn’t be difficult to find a website that is consistent with your sense of aesthetics and workmanship. The sites’ design and system tools are also made in such a way to make navigation easy.
You can easily find interior design magazines at any newsstand. These publications usually feature the best houses in the city or community, as well as the houses of the well-to-do. The pictures, text and other articles in the magazines would be a great help in coming up with a working sketch for your home design. This can also allow you to get the names of prominent interior designers who are featured in the magazine. Some of them are willing to have consultations with clients. If you like his ideas, you may get his design firm’s services or adapt the ideas with those that you already have in your initial plans.
There are also a lot of programs that could be used for designing houses. Software development style tools are definitely very helpful when it comes to this task. Instead of merely imagining what the final space would look like, you can now see the three-dimensional layout through the use of your computer. You may even custom fit your desired furniture pieces by adding them to the design. This will give you a good look at the finished product before you even hammer down the first nail. It can also be a great way to gauge just how much you can put into your space in terms of color and furniture.
Almost everyone dreams of having the perfect home. Before you venture out into designing and laying out your interiors, it might be a good idea to visualize these with the help of various tools and reference materials, so that when it’s time to buy the furniture, equipment and materials, you won’t be second guessing yourself.
The kitchen is one of the most used rooms in any house. This is also the one of the rooms that tends to be forgotten when it comes to decorating. Unless you have a big house with a well-appointed kitchen, it can be a room that is cramped and always lacking for space. It is also quite difficult to find appropriate items to decorate a kitchen. With some ingenuity and clever planning you can decorate your kitchen using your kitchen utensils and appliances. Take a look at the ideas below for inspiration.
- Take an inventory of all the kitchen utensils and appliances that you have in your kitchen. If you have a lot of copper pans that you are just storing in your kitchen cabinets and are gathering dust, it is time to take them out, display them and put them to good use. It is the same if you have more pieces that are made of stainless steel and glass. This will help you tie up the rest of the décor.
- Check the space where you place your small kitchen appliances. Sometimes a different location for a particular appliance can make a big difference in the place. It you have plenty of spice canisters and bottles that is taking a lot of counter space, consider buying a spice rack that you can attach to a wall in your kitchen where it can be readily accessible when you are preparing your food. Look for one that goes well with the overall color scheme of your kitchen, either in a contrasting or a complementary color.
- Hang your pots and pans from the ceiling by installing a metal pot holder. This will not only display your pots and pans, it can be the focal point in your kitchen, whether you have copper or shiny stainless steel pots and pans.
- A mug holder with colorful mugs can brighten up your breakfast counter. There are sets of mugs that you come in different colors and designs. Look for a unique and big ceramic mug that can be used as a flower vase to add more color to the counter.
- Use an old metal pitcher as a flower vase and arrange a colorful selection of silk flowers. You can place this on top of a kitchen shelf. Old coffee cans may also be used to hold floral arrangements. Use an old coffeemaker together with some old coffee canisters or a collection of beautiful coffee mugs to provide an elegant shelf topper.
- If you are going for stainless steel and glass look, there are several functional appliances that you can buy. You can look for a stainless steel holder for your paper towels that you can place on your breakfast bar or kitchen counter. You can also get a stainless steel fruit basket that comes in different sizes and shapes. There are also table napkin holders made from stainless steel in contemporary designs that can give your kitchen a bright and neat appearance.
- If you are just getting small kitchen appliances at this point, consider the overall look and color scheme of your kitchen and look for appliances in colors that will match your kitchen theme. In this manner, your appliances will double up as kitchen décor when placed in conspicuous locations in your kitchen counter.
Do not limit your kitchen décor to just your kitchen appliances and utensils. There are other small functional items that you can use around the kitchen, your counters, kitchen walls and breakfast nooks that will provide a wonderful setting to your kitchen.
Quilts that were once utilitarian and made with scraps from old clothing have now been elevated to an art form. Depending on the age and condition of your quilt you may want to display it in a number of colorful ways in your home. With their meticulous workmanship and interesting color palettes, antique quilts make a beautiful focal point to any room. They lend a sense of history to a room, and they come in all sizes and colors. While some of the older quilts are very fragile you should take care to preserve them as you display them. So be aware of the environment in which you are placing your quilt and take care to keep it out of the way of children, pets and bright sunlight. Here's how to use old quilts as decorations.
Step 1
Quilt Racks
A quilt rack is a beautiful way to display your heirloom quilt if you do not have small children or pets in the house. Placing it out of heavy traffic areas or tucking it in the corner of a room allows the quilt to be enjoyed by everyone while still keeping it out of harm's way. Any time an old quilt is draped in a display, it should be refolded every few months. Of course your do not want to display your quilt in direct sunlight, but even ambient light will cause some slight fading. By refolding your quilt periodically you allow the quilt to fade evenly, and you keep dust from settling into the fabric. Refolding your quilt also prevents a permanent crease from forming in your quilt which may actually damage the fabric. So by simply periodically rearranging your quilt you can enjoy it without any appreciable aging for many years to come.
Step 2
Wall Rods and Display Cases
Another great way to add drama to a room is to display your antique quilt on a hanging rod. Charming and bold at the same time, hanging a quilt on the wall can help define the character of a room. Typically to display a quilt on a rod you will want to sew a pocket along the back of the top edge of the quilt to run the rod through. If you are not adept at sewing, hire a seamstress to do it for you.
As a rule of thumb, you do not want to hang a quilt that is fragile or very old, because gravity will eventually cause the fabric to fail, and this will ruin your quilt. The best way to display a fragile quilt is in a display case designed especially for displaying antique quilts without any damage to the fabric.
Step 3
Draped on a Sofa
And finally one of the most common and beautiful ways to decorate with quilts is to simply fold it over the back of your couch. Again, this option may not be the best choice if you have small children or pets, but displayed on the back of a sofa or couch an old quilt fills the room with its eclectic colors and patterns. Its soft fabric is luxurious to touch, and once touched it all but invites you to snuggle. Obviously displaying your old quilt on the back of your sofa will only work with quilts that are still viable, because it is only a tug away from joining someone for a quick, cat nap.
Adding draperies to a curtain makes it look fancier without the extra cost. The only problem is that draperies can be difficult to create especially if it’s your first time. You need to pleat the fabric to your desired size of draperies. Folding the fabric is quite a challenge. But the hardest part is pleating the fabric evenly. If you have a pleater tape, making draperies will be easy. Just follow the steps below:
- Measure. Take a measurement of the area where you want the curtain be hanged like the window. Measure it twice just to be accurate. After measuring, compute for the adjustment. Remember, you will pleat the fabric to make draperies. The width should be tripled. For the length, add the desired length for the fabric strip on top of the curtain. Usually, this is three inches. Now double the length of the top fabric strip. Add an inch for the overall length and width to allow adjustments for the sewing.
- Sew. Fold one side of the fabric about half an inch and then sew it on. Do the same until all the sides are clean. Iron the folded sides.
- Prepare the top fabric strip. Fold the top of the fabric to the desired length of the strip. Iron the folded end so that using the pleater tape to make draperies will be easier. Sew its open side to the fabric to keep it in placed.
- Choose a pleater tape. Pleater tapes are available in different sizes and design. Choose a pleater tape that is 1/3 the width of the top fabric’s tip. Also, choose the desired design of the draperies. Some tapes will provide wider draperies while some provide narrower ones. Take note that the tape has lines, arrows, and colors on it. Those are your guides for pleating the tape along the fabric.
- Stick the pleater tape on the top fabric strip. Try the pleater tape first on a hidden spot of the fabric. Most of these tapes can be safely put on any fabric. But it is still better to be sure, so test it first. If it’s okay, then put it on the middle so that it will not be sewn with the fabric.
- Pleat the fabric. Start folding the fabric by following the pattern on the tape. Some would fold the fabric and then sew the folded part. Beginners, on the other hand, are more comfortable to fold the fabric and then secure the pleats with a pin. Only after pinning all the way to the end of the fabric that they start sewing the draperies. Do whatever you prefer.
- Remove the pleater tape. You don’t want the tape to stick on the fabric for as long as three days. The adhesive might ruin the fabric so you better remove it right after sewing the draperies. Just pull it up and you’re done. You may reuse the pleater tape if you’ve pulled it out cleanly.
You are now ready to hang the curtain with draperies. Use pleater hooks by pushing them into every pleat. Hang the hook from the curtain rod. Do the finishing touches after that by adding some indoor plants or putting a coffee table near the curtain.
Besides making draperies for curtains, you may also use the pleater tape to make draperies on other projects.
You probably already know that if you are building a new home or remodeling your current one, the windows that you choose will significantly affect the overall look. What you may not know is that they will also affect how energy-efficient your home is. However, it can be difficult to know what the difference is between the R-value and the U-factor. And what about all of those windows that claim to be low-E? It's time to clear up all of the confusion! Here's how to choose replacement windows (or new ones) for your house.
- Style. Some styles of windows are more energy-efficient than others. The most energy efficient ones are casement windows. These open from a hinge, either at the top or one side of the window, by means of a crank that you turn. Because the sash is designed to fit tightly against the weather seal when closed, they let very little air through. In fact, when the wind blows against the glass of a casement-type window, it pushes it against the sash, which simply makes it seal even more tightly. These usually fit in best with a contemporary design. The second type is the double hung window. This is the more traditional style with which you may be familiar. They consist of a lower pane and an upper pane. When you wish to open it, you slide the lower pane upward. The weather seal that is used on double hung windows becomes damaged over time, which means it lets in more air than an undamaged seal. However, these windows can usually be tilted inward for cleaning, which makes them more convenient in this aspect. The third type of is a sliding window. This is basically a double hung window, but it slides from left to right, instead of up and down. It is subject to the same sort of abuse as a double hung window, which makes it just as inefficient.
- R-value. This is the biggest factor in the energy efficiency. But the real question is - what in the world is R-value and how does it affect your windows? To put it simply, R-value is the measure of how much heat loss your windows are capable of preventing. Therefore, you want the highest R-value possible. The lowest R-value that is acceptable if you are trying to build an efficient home is R-3. Of course, the higher the rating, the more efficient the window. The corollary to that is the higher the R-value, the more expensive it will be. A good rule of thumb is to choose a window with the highest R-value that you can reasonably afford, in relation to the energy savings that you expect to receive. This is especially true if you live in a cold climate. Keep in mind that R-value is rated according to the window's efficiency in the center of the glass. The edges will be less energy-efficient than the R-value reflects.
- U-factor. This is the second big factor to consider. U-factor is the measure of how well your window prevents air leaks between the sash and the frame. U-factors less than 0.35 are considered energy efficient. If you live in a climate that is cold and windy, you'll want to give just as much weight to the U-factor of your windows as the R-value. You may also want to consider relocating to somewhere that's warm and sunny all year-round!
- Low-E windows. This type of window is the gold standard when it comes to energy-efficiency. Low-E (also known as low emissivity) windows consist of an inner and outer pane of glass. The area between the two panes is filled with an inert (non-active) gas such as argon, which provides the ultimate in insulation without compromising the clarity of the glass. A step down from low-E types are single-glazed and double-glazed windows, which are coated with a transparent metallic oxide finish that prevents some heat loss. These are much less efficient than low-E, which is reflected in their lower R-values. Single glazed windows are glazed on only one side, double glazed are glazed on both the inside and outside. The least desirable windows, in terms of heat loss, are unglazed. An unglazed window is a simple sheet of glass with no coating or insulation. They are more efficient than an open one, but that's about it! Glazing can be combined with low-E for an even more energy-efficient solution.
- Condensation prevention. Condensation happens when there is a great difference in air temperature between the inside of a window and the outside. If the temperature and the humidity inside your home are high, and the temperature outside is low, you will probably see condensation forming. Conversely, the same is true if the temperature outside is quite high and the indoor temperature is cool. Condensation is a problem for windows because when moisture frequently collects around the edges of your windows, over time it will cause damage to the frame and weather seal. It's also a problem because it indicates that your windows are not insulating your home very well. To prevent condensation, look for windows with warm-air technology and high-quality metal spacers along the edges of the panes. The warm air keeps the temperature of the window closer to the air temperature of your home, which won't give condensation a chance to form.
- Solar (UV) penetration. This is an important consideration for anyone living in an especially warm climate. When the sun is constantly shining through your windows, you'll notice that your carpet, furniture and anything else in the sun's path starts to look faded and worn prematurely. To keep this from happening, look for an ultraviolet-blocking coating. This will allow the harmless rays of the sun to shine right through, while blocking the UV rays, which do the most damage.
- Window placement. When you are deciding where to place the windows in your home, consider the fact that south-facing windows let in heat without an undue amount of UV rays. Therefore, they can help warm your home during the colder months. North-facing windows, on the other hand, provide very little warmth and can actually be a hindrance to keeping your home warm. To illustrate this fact, just look at the driveways on your street after a snowstorm. Most likely, the driveways that face south will be melted and clear long before the ones that face north. Therefore, if you are set on floor-to-ceiling windows in your great room, put them on the south side of the house if at all possible.
- Building code requirements. Many states have adopted building code standards which regulate the type of windows which you are allowed to install in a new or remodeled home. Always check your local building code before purchasing or installing new windows. This is especially important if you are buying them from an out-of-state source. Those sold at a local store will most likely meet your state's building codes, but those from an out-of-state source may not.
- Rebates. Some utility companies now offer rebates if you install energy-efficient windows. In some cases, the rebate is significant enough that you will end up paying nearly the same for energy-efficient windows as you would for ordinary ones. Check the website for your local utility company to see if they offer these types of rebates.
There you have it - the world of windows reduced to seven simple steps! Naturally, a well-insulated window is only as good as its installation, so always have them installed by a professional and make sure all of the seams are caulked and sealed well.